One of the simplest ways to have a secure site is to use the server's built-in self-generated certificate. To access the SSL menu, click on the "Advanced Tools" link from the main control panel menu, then click the "Install SSL Certificates" icon.

Make sure the radio button next the "User the server's certificate" is selected, and click the "Save" button at the bottom of the screen.
Understanding non-Trusted Certificates
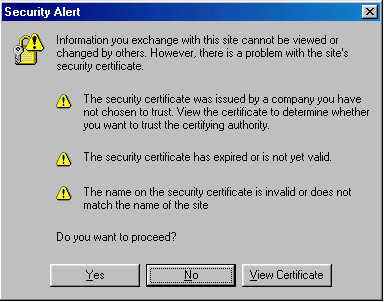
Although non-Trusted certificates provide a high level of encryption, they are not always the best choice because they are self-generated instead of purchased from a trusted authority. Because of this, visitors to your site may receive a warning popup window when they access a secure page:

If you can put up with this inconvenience, then a self-generated secure certificate is adequate for your site. If you are a company selling goods or services, we highly recommend that you purchase a trusted certificate. A non-trusted certificate may be harmful to a web site's reputation.
Uploading Files to your Secure Site
All secure files need to be uploaded to the /domains/domain.com/private_html directory. You may upload using the control panel's built-in file manager or FTP. For example,
/domains/domain.com/private_html/index.html ---> https://www.yourdomain.com/index.html
/domains/domain.com/private_html/secure/index.html ---> https://www.yourdomain.com/secure/index.html
The private_html directory operates the exact same way as the public_html directory.
Note: You will not see a private_html directory if the SSL feature isn't enabled on your account.

